Getting Started
This functionality is in beta - please learn more here.
Prerequisites
- Create an account on DroneDeploy if you do not have one already.
- Become a DroneDeploy Developer
- Request an API key by contacting developer@dronedeploy.com if you do not already have one.
Sample App
To get you started, we have created a sample app. By deploying this sample app, you will learn to use every aspect of the DroneDeploy SDK.
Overview
The app you will be deploying will enable the following flow:
- A user creates an export
- When the export completes, an export complete Trigger will go off
- The Trigger will call out to your DroneDeploy Function
- The DroneDeploy Function will call to your IFTTT webhook endpoint

Installation
- You will need to have npm and node.js installed. Note that we currently support node.js 6 runtime
6.14.0 First clone the open-sourced app-examples repository
$ git clone git@github.com:dronedeploy/app-examples.gitWe use the serverless platform for deployment. You will need to install this globally
$ npm install -g serverlessNavigate to the IFTTT example
$ cd app-examples/IFTTTInstall the dependencies. This will install the dronedeploy-cli, which is a development tool to make App Development much easier.
$ npm installAdd your API key to dronedeploy-cli
$ serverless config credentials --provider=dronedeploy --key=<YOUR API KEY>
App Deployment
Navigate to the settings page and add the
IFTTT/appdirectory to the App Zone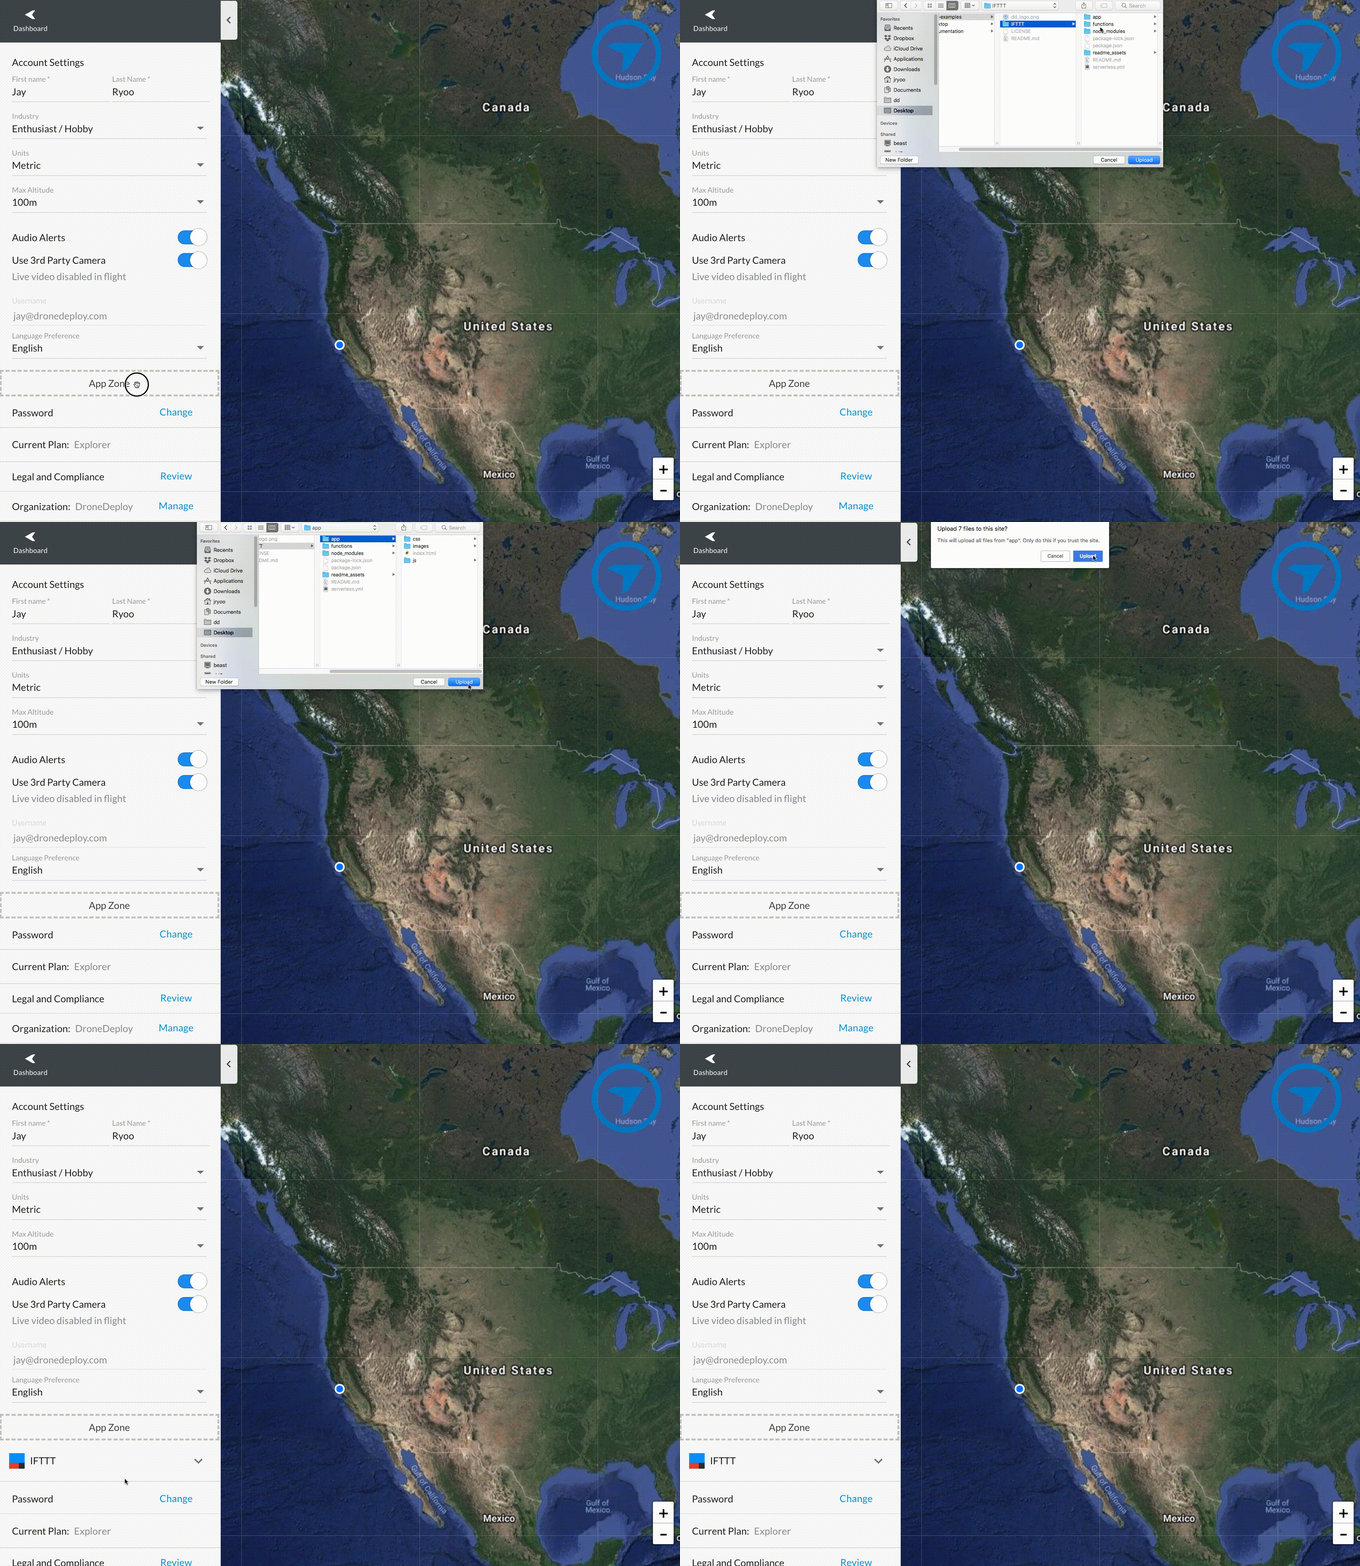
Go to the App Market Installed Apps tab to see your new app listed. Go and change the name from
apptoIFTTTand copy the App ID.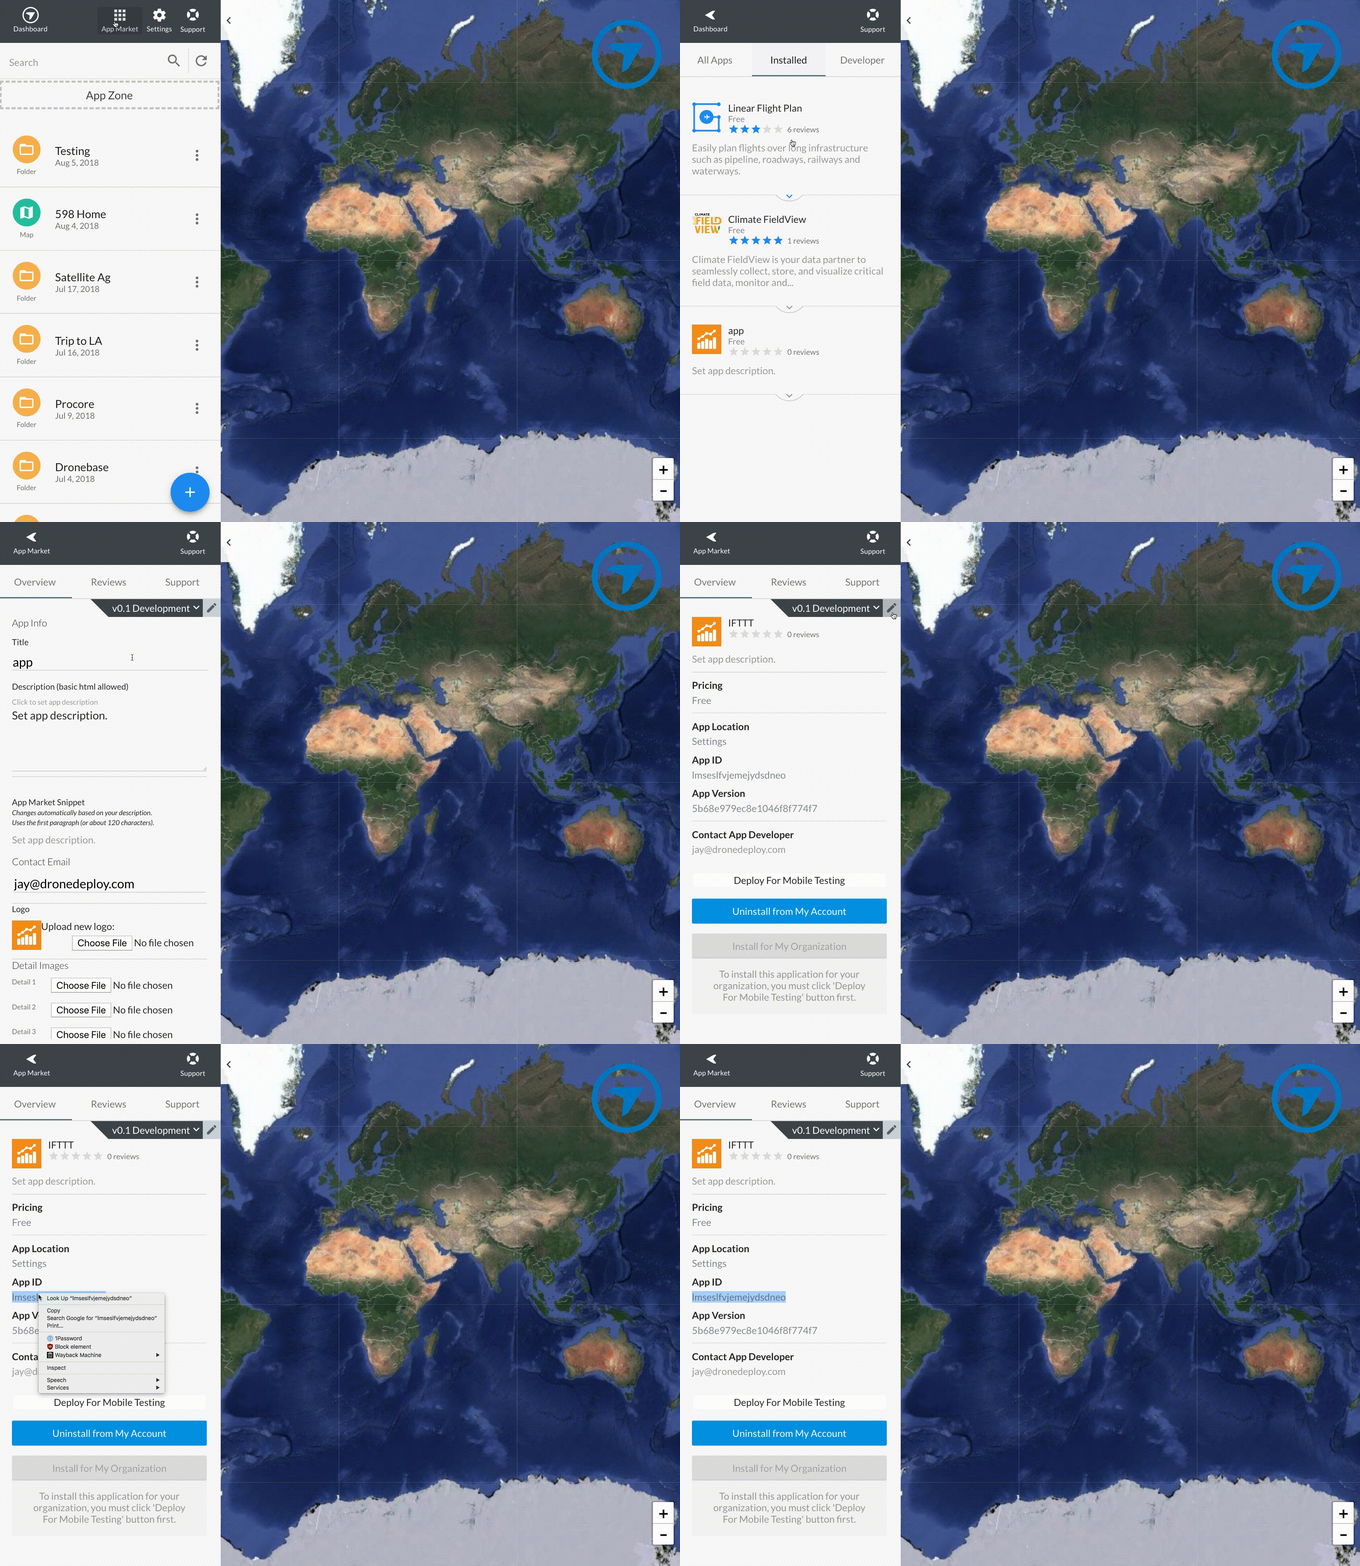
Press the "Deploy For Mobile Testing" button to checkpoint your app and to make the app available on mobile.
Copy the App ID into your
serverless.ymlfile in theappfield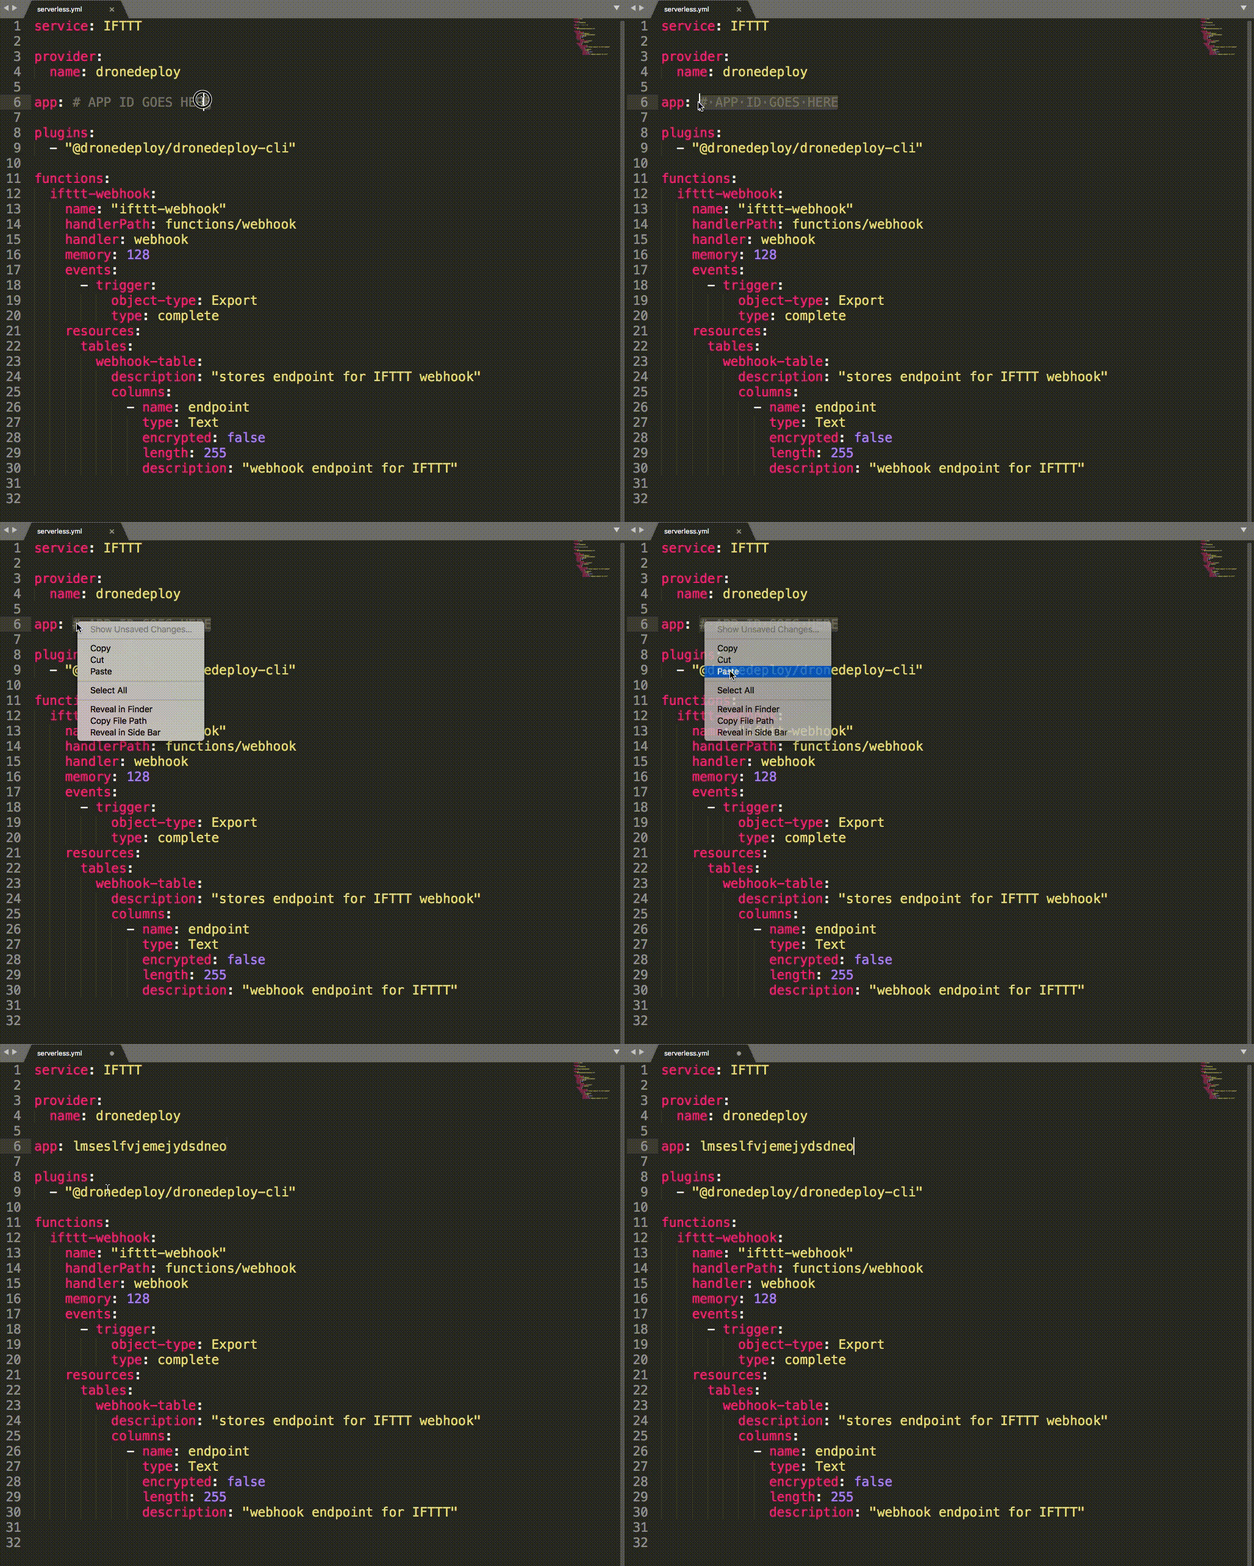
Now you are ready to deploy the app with the following command
$ serverless deployNote that this will do the following:
- Deploy the defined
ifttt-webhookFunction - Deploy the Export Complete Function Trigger
Deploy the
webhook-tableDatastore tableThe deployment should look something like this:
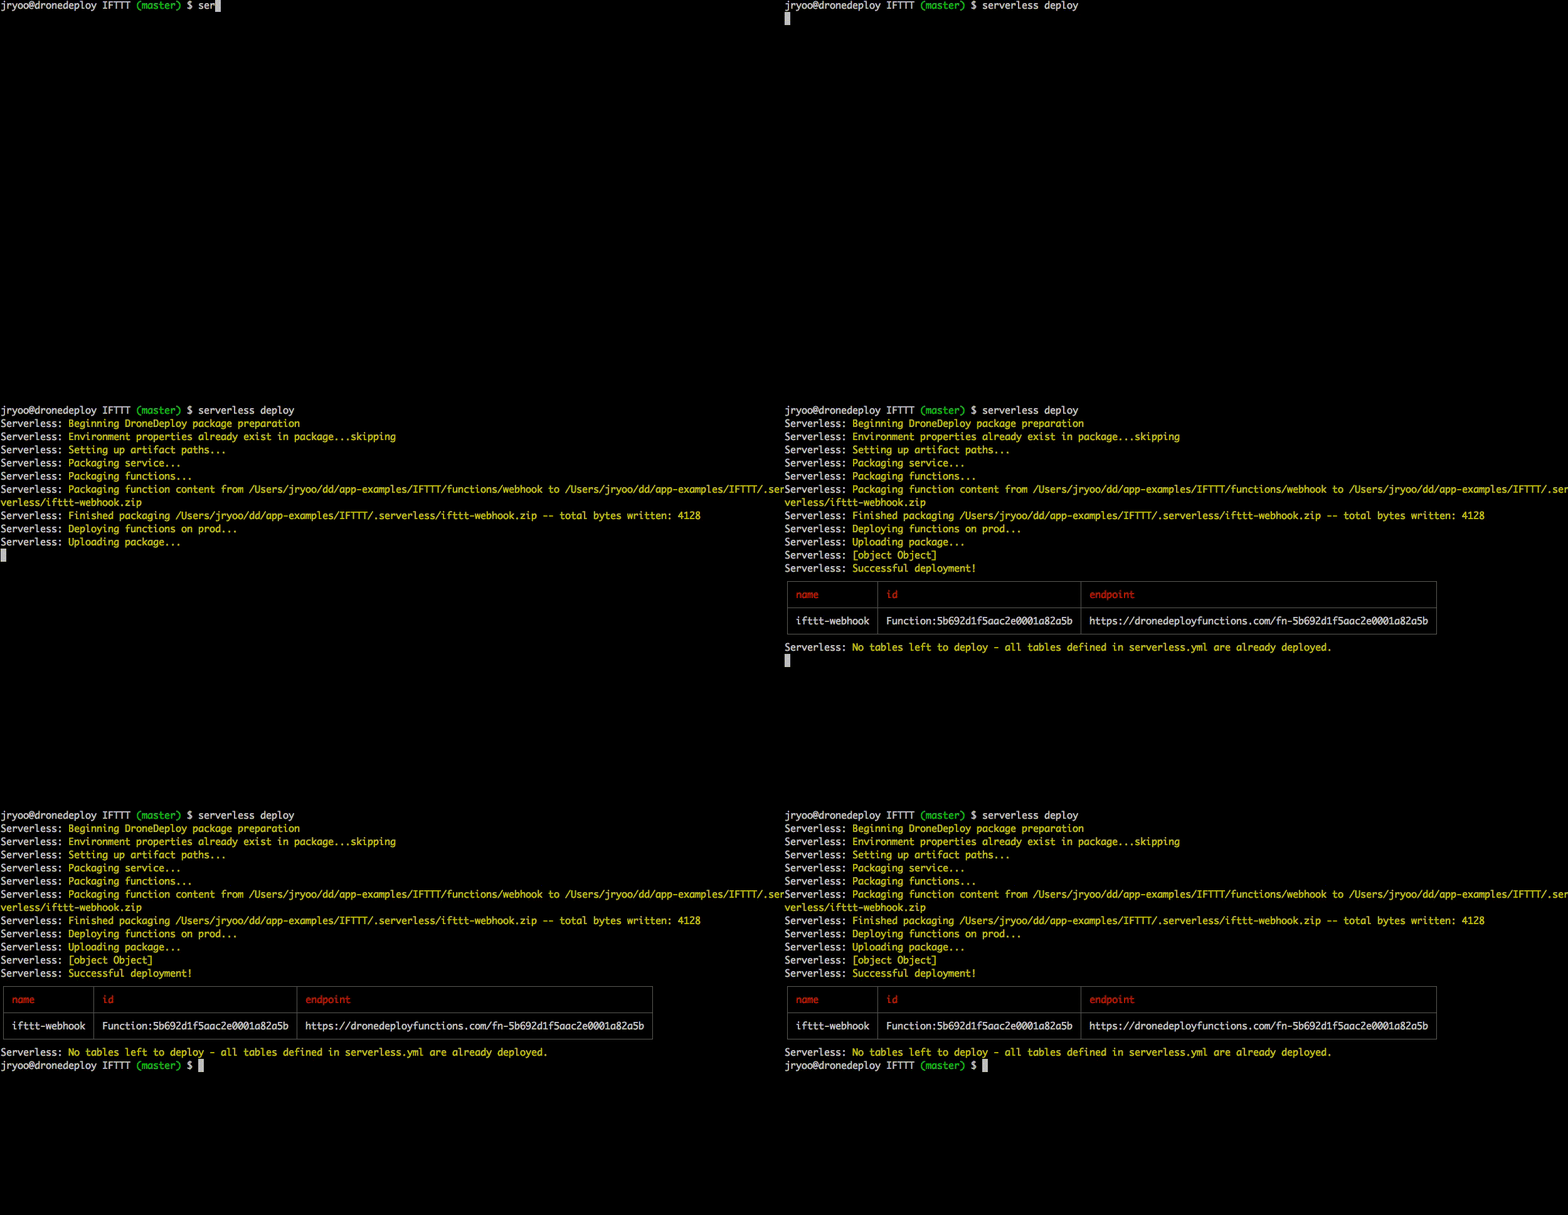
- Deploy the defined
If everything went according to plan, you should now have a Datastore table, a DroneDeploy Function, and a Trigger definition!
IFTTT Setup
Sign up for an IFTTT account if you do not have one already.
Go to the IFTTT webhooks service page and activate it by pressing
Connect, then generate a new webhook endpoint by going into thedocumentationpage. Enter indronedeployas the event name and copy the webhook endpoint.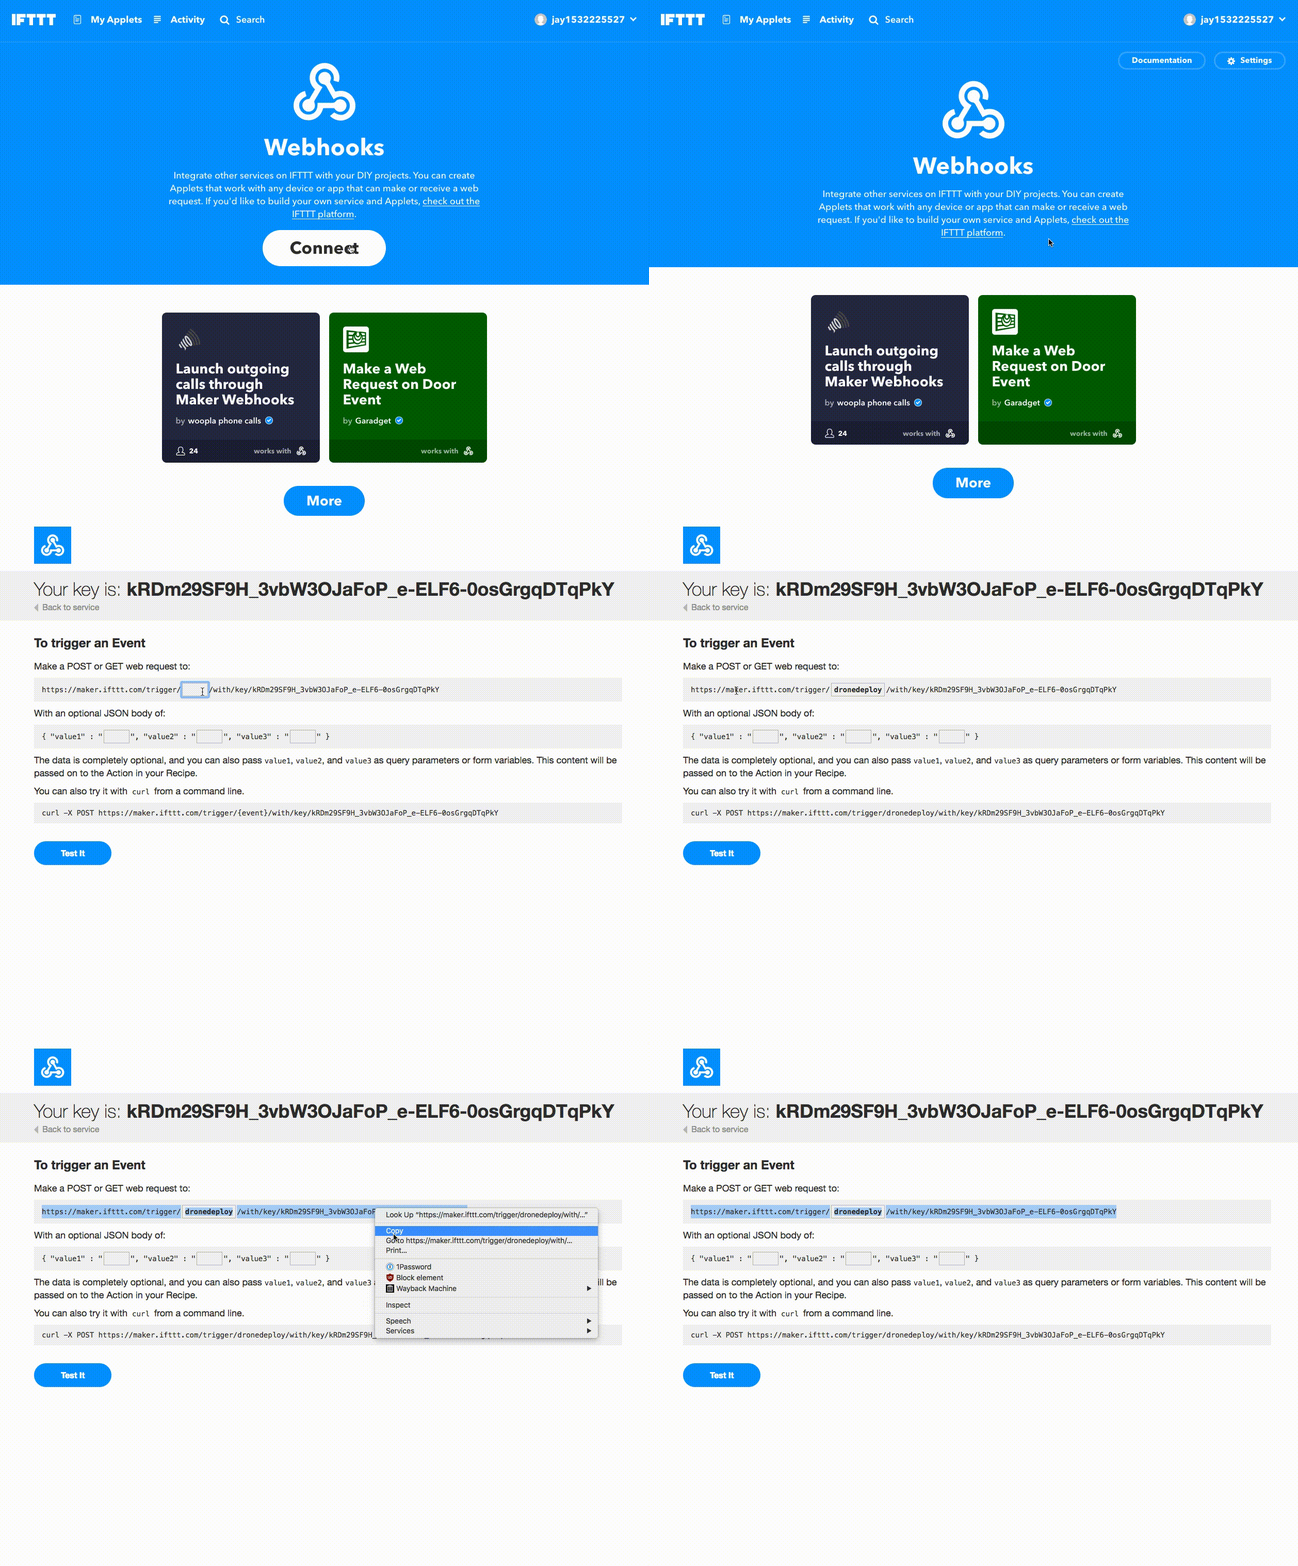
The URL should look something like this
https://maker.ifttt.com/trigger/dronedeploy/with/key/calBarcsa1DcqmSN9_D1acbCopy and paste your URL into your App UI and press save. This will save this URL by passing the URL string to the
ifttt-webhookfunction, which will then save the URL to the definedwebhook-tableDatastore table. Try refreshing the page and opening the app - you will notice that your URL is still there and now persisted in your Datastore!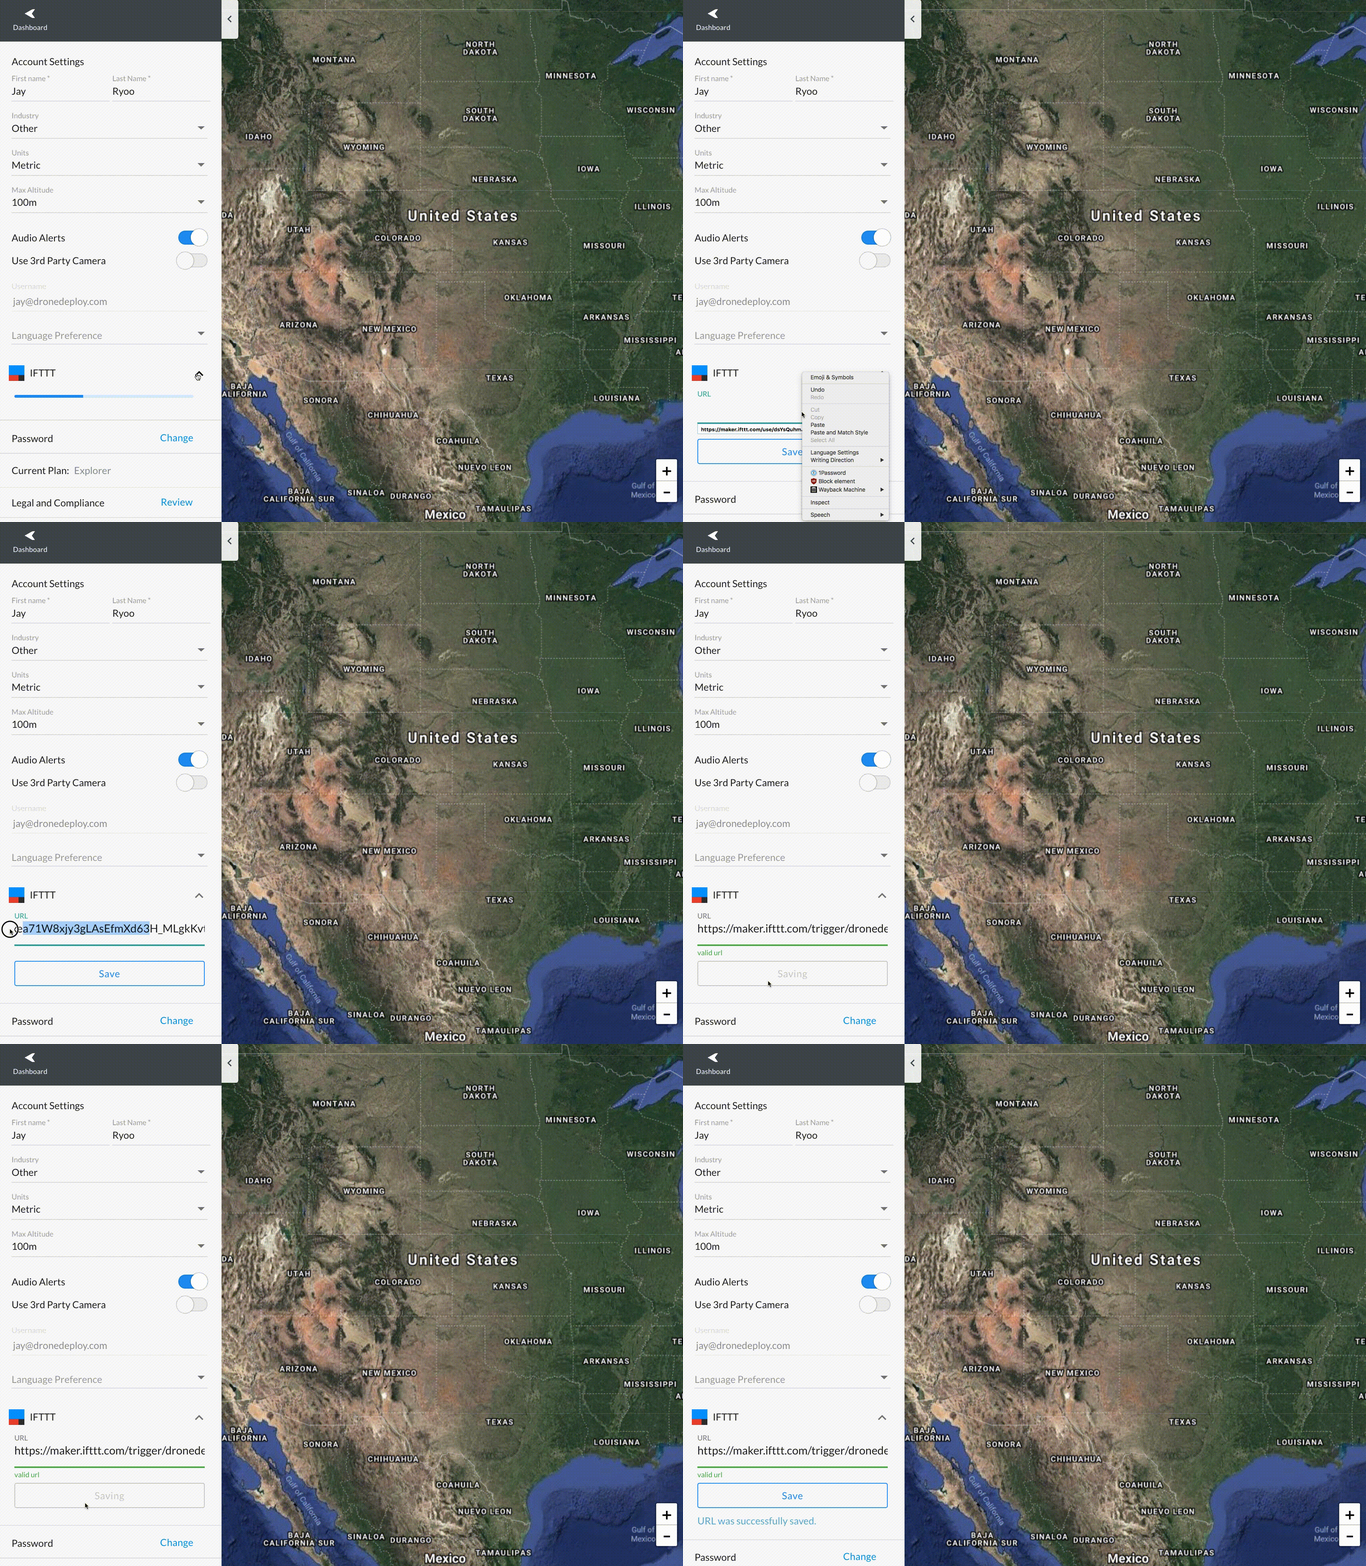
Create an Applet on IFTTT using your new IFTTT webhook service as the trigger. Don't forget to select the Webhook at the service and set the event to dronedeploy. In this GIF, we are showing an Applet that emails you when a trigger fires. You can find more documentation about how to build an IFTTT Applet here.
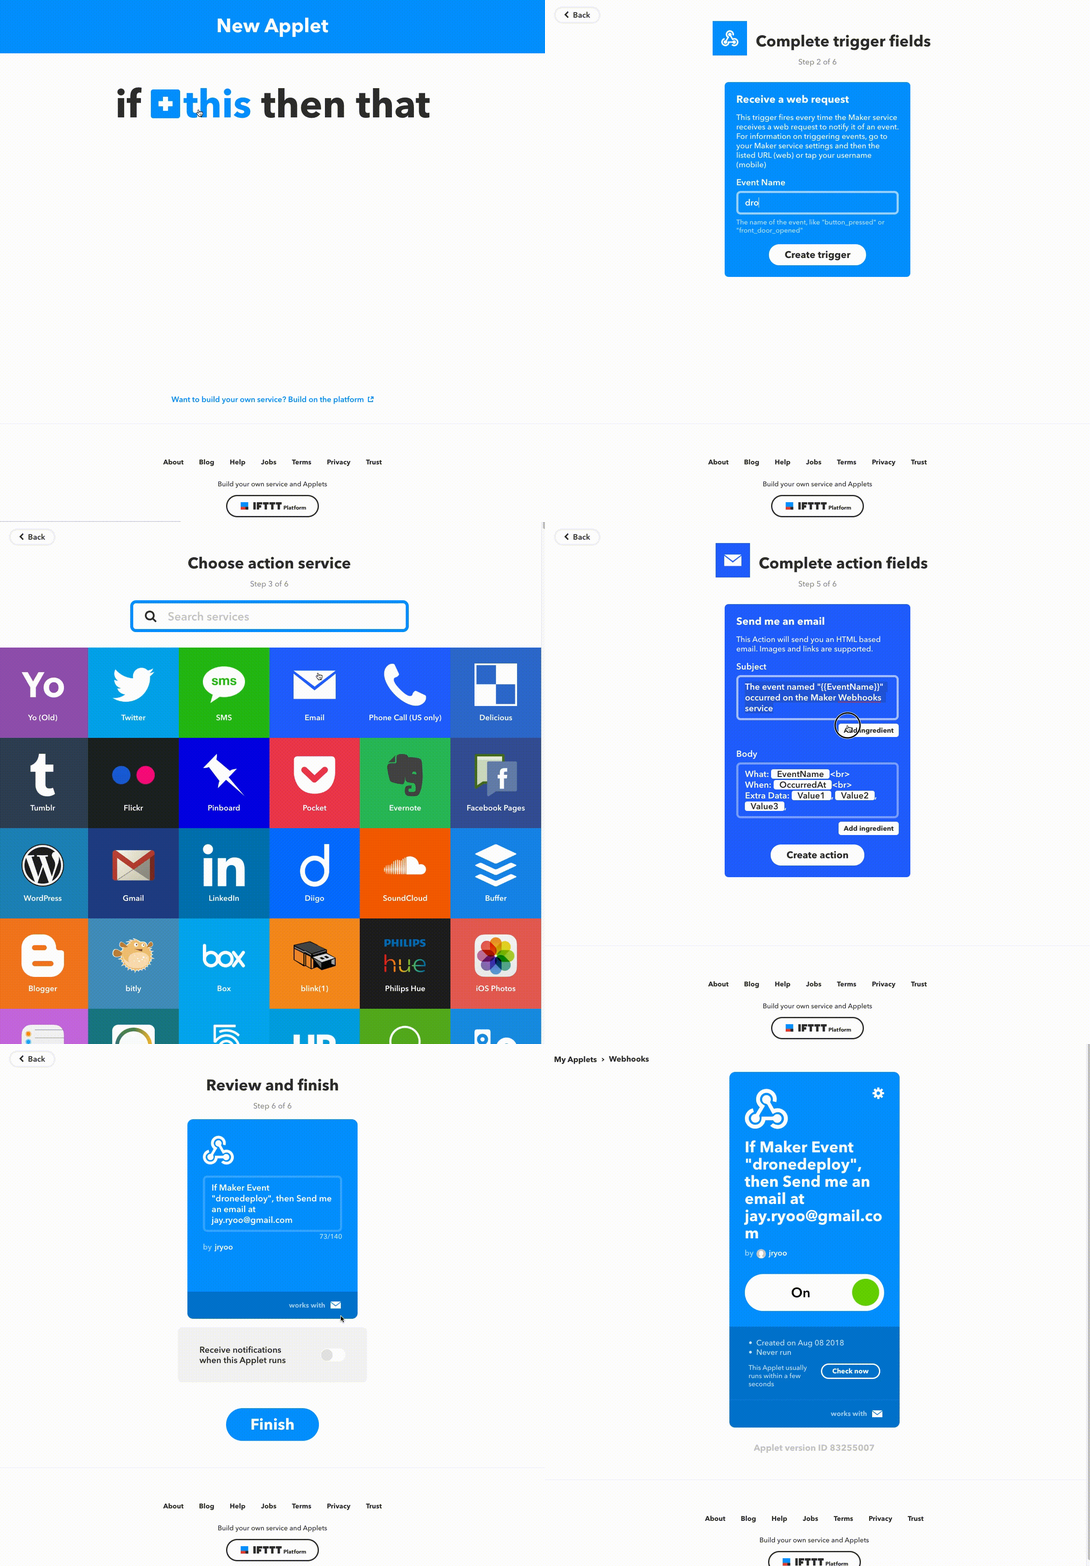
Now if you perform a DroneDeploy map export, you should get an event in IFTTT! When an event triggers, you will see that your IFTTT Applet ran under the activity tab.
Next Steps
Learn more about how to extend the sample app or build your own from scratch here.
